Why Motorcycle Maintenance Is Important...
Re: Motorcycle maintenance... The saying that “an ounce of prevention is worth a pound of cure” is especially true when it comes to motorcycle maintenance and maintaining mechanical systems. Since your motorcycle is not “self-healing” and will not fix itself it is up to you to ensure that it gets the proper care.Following are the basics of motorcycle maintaineance:
GENERAL INSPECTION:
Good motorycle maintenance means a safe machine. A careful check of certain equipment must be made after periods of storage and frequently between the regular service intervals to determine if additional motorcycle maintenance is necessary. The following items should be checked regularly:
1. Tires-for correct pressure, abrasions or cuts.
2. Drive belt and primary chain-for proper tension.
3. Brakes, steering and throttle-for responsiveness.
4. Brake fluid-for level and condition.
5. Hydraulic lines and fittings-for leaks.
6. Brake pads and discs-for excessive or disproportionate wear.
7. Cables-for fraying or crimping and free operation.
8. Engine oil, primary chaincase, and transmission fluid for proper levels.
9. Wheel spokes-for tightness.
10.Head lamp, tail lamp, brake lamp and directional lamps-for proper operation.
Motorcycle Maintenance: FILTERS
ENGINE OIL FILTER:
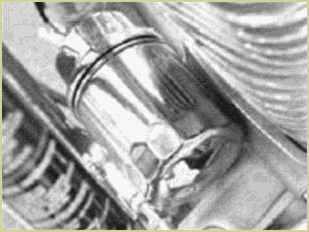
Oil filters are also very important in motorcycle maintenance. The oil filter is located on the oil filter mount at the base of the front cylinder (see illustration). The oil filter should be replaced every time you change the oil. Since this component is so crucial to the life of your engine, use only the highest quality filter.
AIR FILTER:
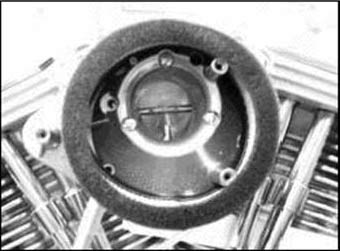
Cleaning your air filter...good motorcycle maintenance. The engine air cleaner is a foam air filter element. Remove the air cleaner cover and inspect the filter element at the 500 mile service and at every 2500 mile service thereafter. The foam air filter element should be washed in clean solvent. Allow the filter to either air dry or blow it dry, from the inside, with low pressure air. Use an air cleaner filter oil to treat the foam air filter element. Over time, if the filter element looses its elasticity and will no longer fit tightly, or if it becomes soiled or damaged to the point that it may be hindering air flow, it should be replaced. Because of the critical job that it performs make sure to replace it with quality elements designed specially for your carburetor.
Motorycle Maintenance: FLUIDS
ENGINE OIL:
Use only premium 20W50 detergent motorcycle oil. The quality and cleanliness of your engine oil, as well as maintaining the proper oil level, are three of the most important factors in preventing abrasive wear inside your engine.
CHECKING ENGINE OIL LEVEL:
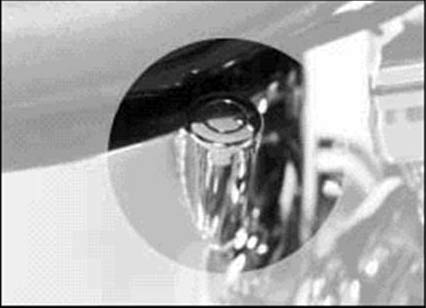
Another motorcycle maintence tip: The engine oil level should be checked when the engine is at normal operating temperature. The engine will require a longer warm up period in colder weather. A good time to check is at each complete fuel refill. The motorcycle should be ridden to ensure that the oil is hot and is at normal operating oil temperature. When the above conditions are met, turn the engine off and proceed as follows: When checking the oil level, the motorcycle should be straight up and level. Remove the sight cap (See Illustration) by pulling steadily on the oil fill plug while moving it back and forth. The oil level should be at the base of the oil tank filler neck. If the oil level is below the base of the filler neck, add only enough oil to bring the level up to the base of the filler neck.
CHANGING ENGINE OIL:
Oil should be changed after the first 500 miles for a new engine, and thereafter at 2,500 mile intervals in normal service at warm or moderate temperatures. Oil change intervals should be shorter in cold weather. Since engine oil is a major factor in the performance and service life of the engine, always use the proper grade of oil for the lowest temperature before the next oil change. A simple but effective motorcycle maintenance step.
TRANSMISSION FLUID :
Use only high quality transmission fluid. As with the engine oil, the quality, quantity, and cleanliness of your transmission lubrication are the key factors in preventing abrasive wear. The transmission lubricant level should be checked monthly.
CHECKING TRANSMISSION FLUID LEVEL:
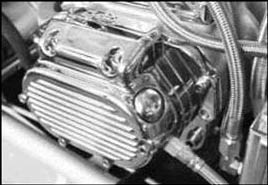
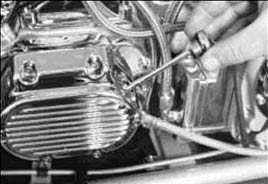
The transmission lubricant level should be checked only when the engine is at the normal operating temperature. Turn the engine off and position the motorcycle STRAIGHT UP and LEVEL, not leaning on the side stand. Keep it in that position for a short period to allow the lubricant level to equalize in the transmission before checking. Remove the threaded filler plug (See Illustration) and wipe the dipstick. Put the dipstick filler plug back into the filler hole, but do not screw it in. Remove the dipstick and take the reading. The lubricant level should be between the two marks on the dipstick. Add lubricant if necessary. Do not overfill or leakage may occur. The transmission capacity is approximately 20 ounces. When reinstalling the filler plug, tighten it to 25-75 in-lbs. (finger tight).
PRIMARY CHAINCASE OIL:
Motorcycle maintenance tip: Lubrication is a major factor in the performance and service life of the clutch components. Use a high-grade chaincase lubricant that functions properly at all operating temperatures.
CHECKING CHAINCASE LUBRICANT:
Position your motorcycle STRAIGHT UP and LEVEL. Remove screws and washers that secure the clutch inspection cover. Remove clutch inspection cover carefully to avoid damaging O-ring or finish on cover. Primary chaincase lubricant should be at the bottom of the clutch diaphragm spring. Add lubricant as required.
BRAKE FLUID:
Every 5,000 miles check the fluid level in both of the master cylinder reservoirs. Use only D.O.T. 5 SILICONE HYDRAULIC BRAKE FLUID approved for brake system use.
Motorycle Maintenance: SUSPENSION
INSPECTION & LUBRICANT:
Use recommended wheel-bearing grease for steering-head bearings, wheel bearings and rear-fork bushings. Use a multi-purpose chassis grease for other applications. 8 motorcycle maintenance inspection and lubricant tips...
1. Repack front and rear wheel bearings every 10,000 miles (more often in adverse conditions), or yearly if operated under winter conditions or prior to storage. Replace seals and axle spacers if they show any wear or distortion.
2. Remove and lubricate handlebar throttle control grip sleeve with fresh graphite every 5,000 miles, once each year, or when operation indicates lubrication is necessary.
3. Every 2,500 miles lubricate throttle control cables. Lubricate the front brake hand lever and clutch-control hand lever when necessary.
4. Pack the steering head bearings with fresh grease at 10,000-mile intervals or every 2 years, whichever occurs first.
5. Lubricate the side stand mechanism with anti-seize every 2,500 miles.
6. All control connections should be oiled regularly, particularly after washing the motorcycle or driving in wet weather.
7. Tightness of the rear fork pivot shaft fastener should be checked after the first 500 miles and every 5,000 miles thereafter.
8. Have front forks checked for proper bearing adjustment at 500 miles and every 5,000 miles thereafter. Bearings should be re-packed at 10,000 miles intervals.
WHEELS & TIRES
WHEEL INTEGRITY:
Periodically inspect spoke wheels for tightness of individual spokes. Inspect both spoke and mag wheels regularly for dents or cracks.
TIRE INTEGRITY:
Be sure to keep tires properly inflated. Tire Integrity, for correct cold tire inflation pressures.Check before riding when tires are cold. Do not over-inflate tires. Improper tire inflation will cause abnormal tread wear and could result in unstable handling. Under-inflation could result in unstable handling. Under-inflation could result in the tire slipping on the rim, or sudden tire failure.
ENGINE:
HYDRAULIC LIFTERS:
The engine is equipped with hydraulic lifters. Hydraulic lifters automatically adjust in length to compensate for engine expansion and valve mechanism wears. This keeps the valve mechanism free of lash (excessive play) when the engine is running. When starting an engine, which has been turned off even for a few minutes, the valve mechanism may be slightly noisy until the hydraulic units completely refill with oil. If at any time, other than for a short period immediately after engine is started, valve mechanism becomes abnormally noisy, it is an indication that one or more of the hydraulic units may not be functioning properly. If a hydraulic unit appears to have failed, verify that the oil tank is properly filled and that the hydraulic lifter oil screen is clean. If the oil tank is properly filled and if the problem persists, see your authorized service center for service.
PUSHRODS:
The pushrods in the engine are adjustable in order to achieve proper initial length. Adjustments should only be done by an authorized dealer or service center.
IGNITION TIMING:
Ignition timing is preset. Spark timing is advanced electronically, as the engine speed increases or decreases, to suit starting, low-speed, and high-speed requirements. Ignition timing should be checked every 5,000 miles. If ignition timing is not correct, see your authorized dealer or service center. The engine in your motorcycle has been designed specifically to achieve optimum fuel economy with exhaust-emission controls. Ignition characteristics have been developed to provide maximum engine performance and driveability.
Motorcycle Maintenance: THE PRIMARY DRIVE
PRIMARY CHAIN INSPECTION:
The primary chain adjustment should be checked initially at 500 miles, then every 5,000 miles and serviced as necessary. If the chain is allowed to run loose, it will cause the motorcycle to jerk when running at low speed, and chain and sprockets will wear excessively. To prevent this from happening, see your dealer or authorized service center for the proper adjustment procedure.
Motorcycle Maintenance: THE TRANSMISSION
Initially, have the clutch adjustment checked at 500 miles by your dealer or authorized service center then every 5,000 miles.
SHIFTER LINKAGE ADJUSTMENT:
Remove the bolt connecting the shift rod to the forward control unit. Loosen the jam nut at the base of the shift rod eyelet. Spin the eyelet in to raise the shift lever or out to lower the shift lever. Once you have the lever where you want it, retighten the jam nut and reconnect the shift lever to the forward controls.
Motorcycle Maintenance: THE FINAL DRIVE
DRIVE BELT INSPECTION:
The final drive belt inner tooth surface has a thin coating of polyethylene. During initial operation, this coating will wear as it is burnished into the belt fabric. This is a normal condition and not an indication of belt wear. Belt tension should be checked after the first 500 miles and every 2,500 miles thereafter.
Motorcycle Maintenance: THE BRAKING SYSTEM
FRONT & REAR BRAKE INSPECTION:
Initially, check your front and rear breaks at 500 miles then every 2,500 miles.
BRAKE LINE & MASTER CYLINDER INSPECTION AND SERVICING:
Whenever you inspect the brake pads and discs, also inspect the brake lines and master cylinders for leakage. The rear wheel master cylinder is located beside the rear brake foot pedal. The front wheel master cylinder is located beside the front brake hand lever. To service the front brake master cylinder, stand the motorcycle on its side stand with the handlebars turned fully towards the sidestand. This positions the front brake master cylinder close to level. Remove the top plate of the master cylinder and see if fluid level is at the full line inside the reservoir. Service accordingly using high quality brake fluid. To service the rear brake master cylinder, position the motorcycle straight up and level. Remove the top plate of the master cylinder and see if fluid level is at the fill line inside the reservoir. Service accordingly using high quality Dot 5 brake fluid.
Motorcycle Maintenance: THE CLUTCH
CLUTCH CABLE INSPECTION & ADJUSTMENT:
Initially, the clutch cable should be checked at 500 miles then lubricated and adjusted every 5,000 miles to compensate for lining wear. The need for attention to clutch controls will be indicated by an engaged clutch slipping under load, or a disengaged clutch dragging, or “creeping” as the throttle is increased. In this situation, the control cable adjustments should be the first thing to be checked.
Motorcycle Maintenance: THE FUEL SYSTEM
Carburetor controls include the throttle, enrichner and idle speed adjusting screw. These components should be inspected for proper operation after the first 500 miles and every 5,000 miles thereafter.
IDLE SPEED ADJUSTMENT:
Operation at higher altitudes (approximately 4,000 ft. elevation) may require carburetor modifications for best engine performance. See your authorized dealer or service center for these adjustments.
Motorcycle Maintenance: THE ELECTRICAL SYSTEM
BATTERY:
It is the care given a battery, rather than the time and miles of service, which is most important in determining its life. Inspect the battery electrolyte level at least once a month, adding pure distilled water as often as necessary to keep the solution above the plates. If the motorcycle has not been used for an extended ended period to time, always check the electrolyte level before placing back in service.
BATTERY SERVICING AND INSTALLATION:
To service the battery you will have to remove the seat. To remove the seat, remove the knob from the rear seat bracket. Then slide the seat to the rear of the motorcycle and lift seat tongue. Clean the cable connectors and battery terminals with a wire brush or sandpaper to remove oxidation. Coat the terminals with petroleum jelly. Connect the cables to the proper terminals: connect the positive cable to the positive terminal first: then connect the negative cable to the negative terminal.
SPARK PLUG & PLUG WIRE INSPECTION & REPLACEMENT:
Inspect and/or replace the spark plugs and plug wires at the 500 mile service and at every 2500 mile service thereafter. Inspect and replace the spark plugs every 5,000 miles on all models. Disconnect spark plug wires from plugs by pulling on the molded connector caps. The connection is the snap-on type. Before installing spark plugs, the gap should be checked and adjusted if necessary to 0.040 in. Be sure that the new spark plugs are the same type as the ones being replaced.
HEAD LAMP REPLACEMENT:
The head lamps are either sealed beam or replaceable quartz halogen bulb type. When replacement is required, use only the specified sealed beam unit or bulb, available from your dealer or authorized service center. A sealed beam or bulb of improper wattage may cause charging system problems.
Motorcycle Maintenance: GENERAL CLEANING
Care should be taken to keep your motorcycle cleaned and waxed as often as possible to inhibit rust and corrosion. Chrome and aluminum parts must be maintained regularly to ensure that they retain their original shine and luster. To aid in keeping your motorcycle clean, see your authorized service center or dealer for cleaning, polishing and waxing products.
Motorcycle Maintenance: PRESERVING YOUR PAINT JOB
With a reasonable amount of care and effort, you can protect your paint job so that it's still turning heads years from now. Here are the five essentials for keeping your paint job looking its best. 5 motorcycle maintenance paint job tips...
1.When not riding your motorcycle, keep it inside. If it must remain outdoors all day (i.e., setting in a parking lot or under a tree,etc.) make sure to keep it protected with a high quality motorcycle cover. Over time, wind, rain, and daily exposure to sunlight all take their toll on your paint job if it is not protected. The time required to utilize a motorcycle cover is a small price to pay for safeguarding your investment.
2. Keep it clean and waxed.
When Cleaning - Do not wash your motorcycle with cool water when the paint has been heated by direct sunlight. This can cause the metal underneath to contract and break the bond with the paint.
When Waxing - Apply and remove wax in the same way the paint was applied, in a linear back and forth motion following the contour of the surface. This avoids etching swirl marks into the finish. Apply wax using your fingers as the applicator. This allows you to detect any grit or abrasive particles before scratching the finish of your paint.
3. Wipe off gasoline spills immediately. Certain chemicals and additives within gasoline can dull or fog your paint job if allowed to remain on the paint.
4. Use only approved cleaners and waxes on your paint job. Harsh cleaners may work great for removing road tar but may also remove or dull your paint.
5. Avoid constant contact (rubbing) with any clothing or travel gear on your paint.
Also, our quality newsletter The Custom Chopper Report has all kinds of suggestions, pictures, and special deals for your motorcycle, and much more. Click here to sign up for it now. It's free and you will look forward to every issue.
Click this link for information on Motorcycle Maintenance and How To Choose The Right Motorcycle Oil.
