1978 FLH Shovelhead Bobber!
by Josh
(MIdland, GA)

1978 FLH
My current project is to bring a classic back to life. I stumbled across an amazing deal on a 1978 FLH with matching case and frame numbers that matched the original title.
I snatched it as soon as I got home from this last deployment and have been pouring love (and money!) in it ever since. It's helped me as much or more than I've helped it, w/ readjusting after a tough deployment.
I'm blessed to have a great friend that has been wrenching on shovels for the last 30 years and he has been helping/mentoring me along the way! Without him I would be light years behind.
I'm giving the bike more of an old school bobber look by stripping all the factory FLH features from the bike. I decided to do away w the drop in filter.
So I made a bracket to mount my regulator and a spin on filter and rerouted all the oil lines.I rewired it w a chopper style wiring system and relocated the ignition switch off of the motor mount.
I've completely rebuilt the primary and transmission and have been lucky so far w the engine. The bike set for four years, but we hot wired it and it turned right over and is screaming like new.
I put a wide glide front end on it w a 21" wheel and for the back it's a 16" but I wanted to make it different somehow. I like the look of the hardtails and they way they sit, but I wanted the old school true shovel look w the shocks.
So I shoved 11" shocks on it and lower profile tires. Fender struts are not for me, so I needed to design a
That sounds easy, but when taking in the consideration of the travel of the swing arm, I didn't want the fender catching on the tire, stuffing it down and throwing me in the ditch. So, we took an ol dresser fender, chopped it to length (twice), cut it in half, fitted it, tact it to some skinny struts we made and mounted it.
It looks great. Now I will just grind the struts smooth, smooth out the rest, throw some body filler in there, shoot it w paint and it will look like one solid piece!
Now, I just need to tie up some loose ends like, make a seat, mount the mini speedo and a few other things and this baby will be on the road. As always, it will be years until I have it right where I want it, but I need it on the road so I can start working on the custom I have in boxes in the corner of the garage.
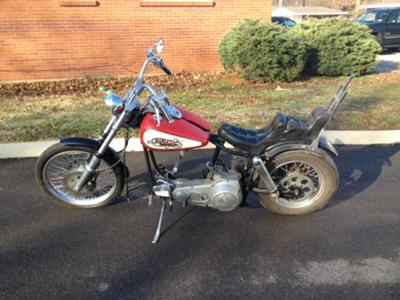
Picture 1: This was the bike in the beginning, without the engine, etc.
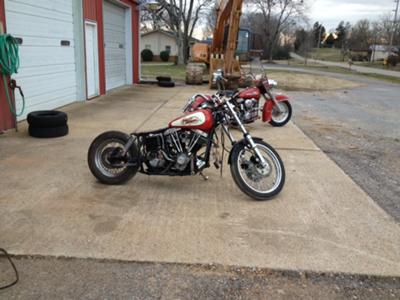
Picture 2: After we got all the drive train in, still had a lot to do!
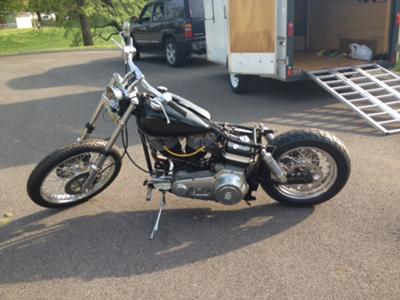
Picture 3: After changing the primary and most of the front end Pic 4 to follow
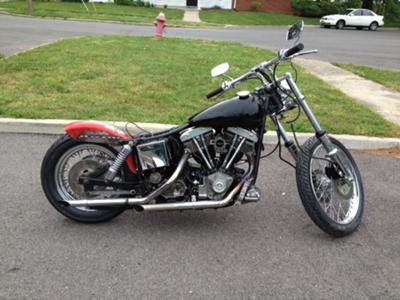
Picture 4: The bike is a little further along than this right now, but this is after rewiring is complete, rear fender has been cut and roughed in.
Now I'm at the point of finishing the fender redoing the brakes, and making a seat and it will be screaming down the road! Hopefully you can add them to the narrative I posted last night.
Comments for 1978 FLH Shovelhead Bobber!
|
||
|
||


